

How To Blend Colors In Adobe Illustrator
Have you ever looked for an abstract object to include in a design, but couldn't find any colors or shapes you liked? In this tutorial, you will learn how to create colorful circles using simple geometric figures and Adobe's Illustrator Blend Mode — let's get started!
Start the program and create a document to the size of your monitor. Take the Ellipse Tool (L), and create a circle shape (hold down the Shift key while dragging) — fill it with a yellow color.
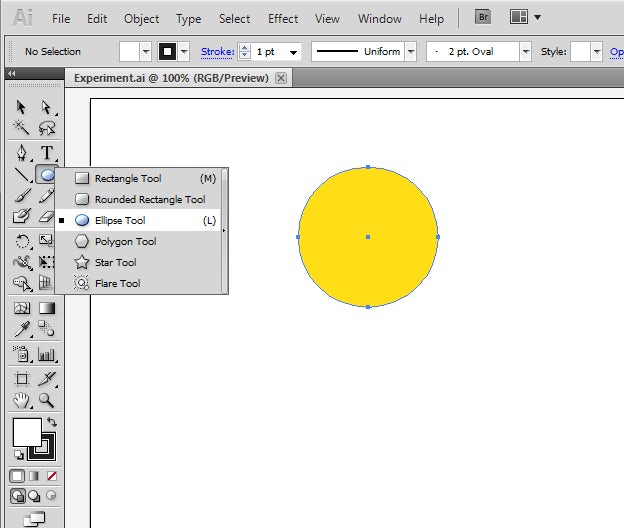
Copy the shape (Ctrl C), paste (Ctrl V) it, and change the color to red.

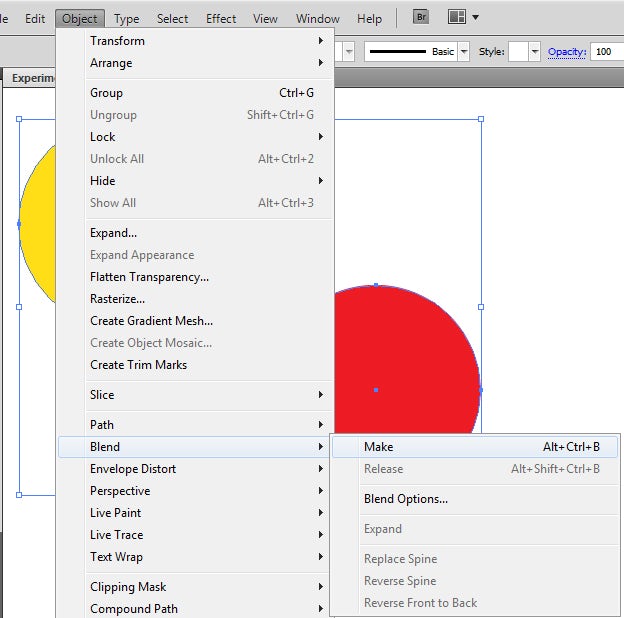
Now select both circles (Hold Shift > Click the object) then go to Object > Blend > Make (Alt+Ctrl B). You will notice the Blend Tool creates the tone colors from yellow to red.
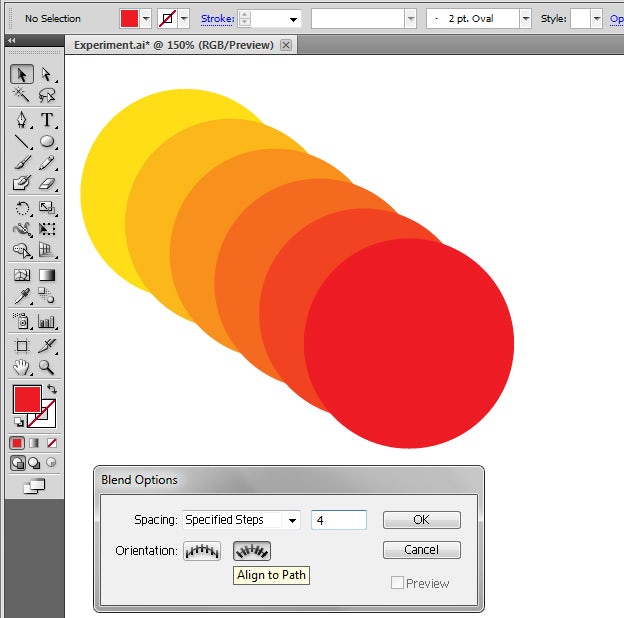
Go to Blend Options — for Spacing choose Specified Steps (4), and for Orientation click Align to Path.
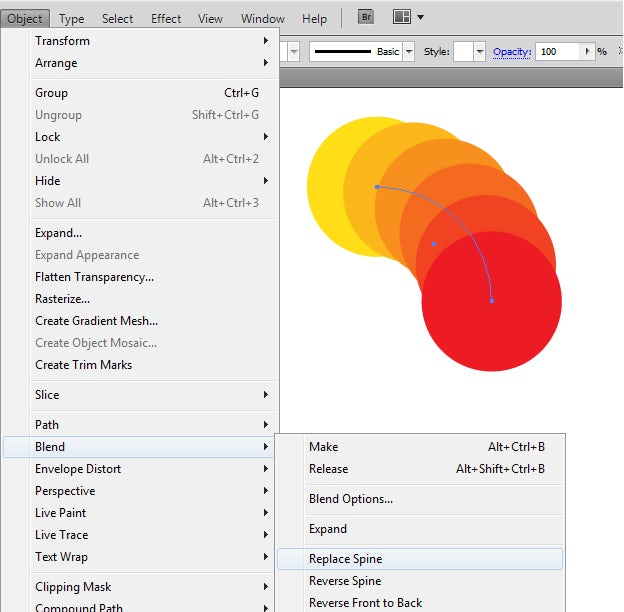
Again, take the Ellipse Tool (L) and create a circle shape, but this time give it only a Stroke (no color filling). Then, delete the 2 anchor points on the path, so we now have a quarter-circle, curved lines.

Hold down the Shift+Ctrl keys while selecting the Blending Mode path line, and the quarter-circle curved line.

After both path lines had been selected, go to Object > Blend > Replace Spine. That command will replace the line Spine (the Blend Object default path) with any path you want.
Duplicate the Blend object and rotate it 90º.
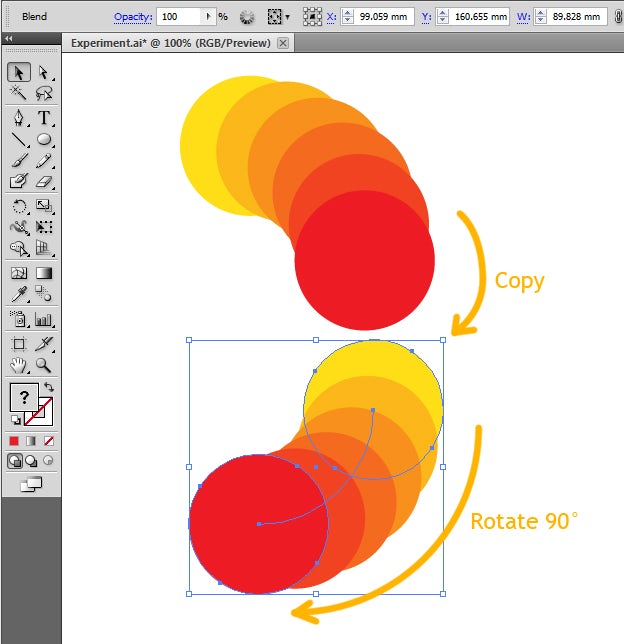
Use Direct Selection Tool (A) to select the circles and change the tone colors from red to blue.
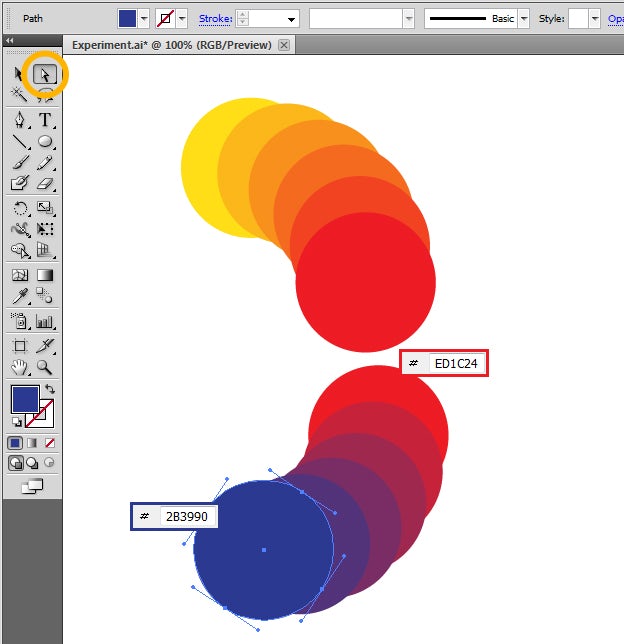
Do the same thing as above until we have 4 different tone colors:
- Yellow to red
- Red to blue
- Blue to green
- Green back to yellow
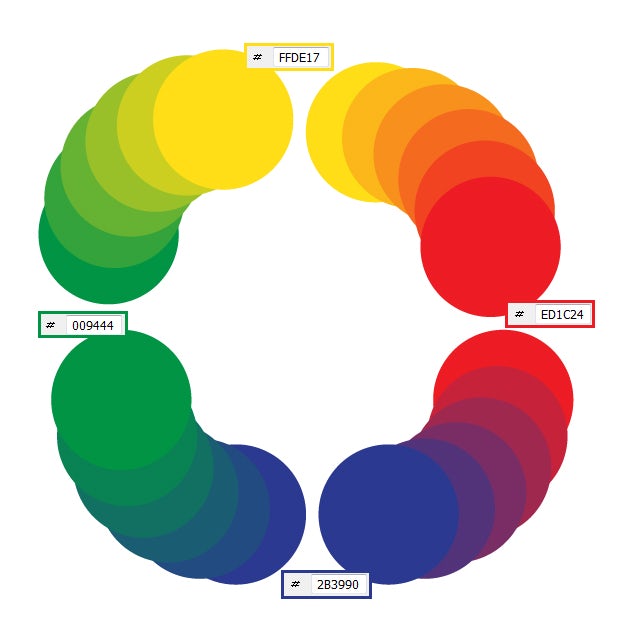
Now align them to each other so it forms like a ring.
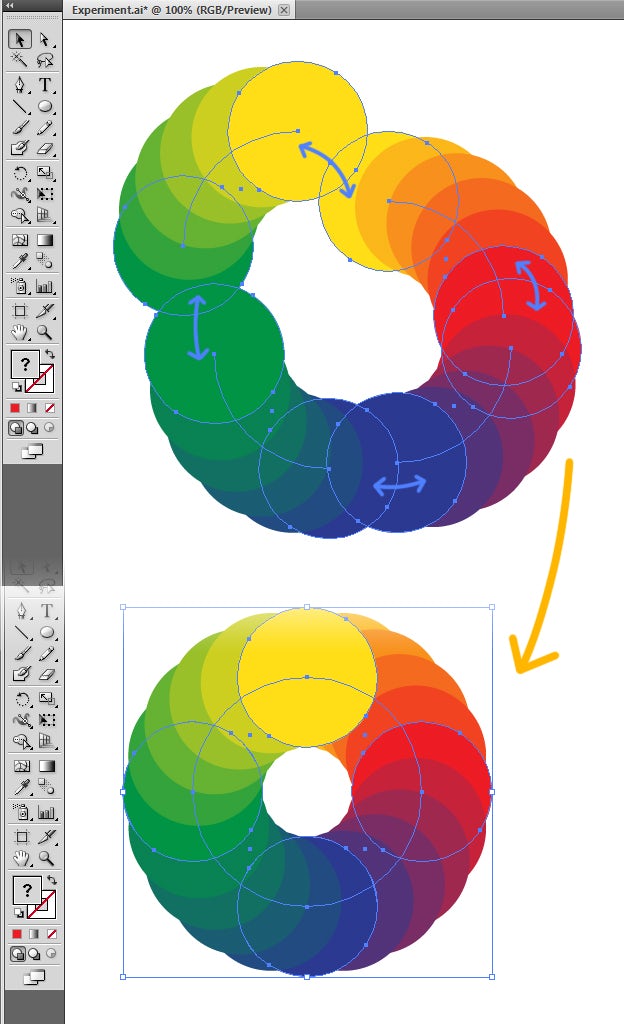
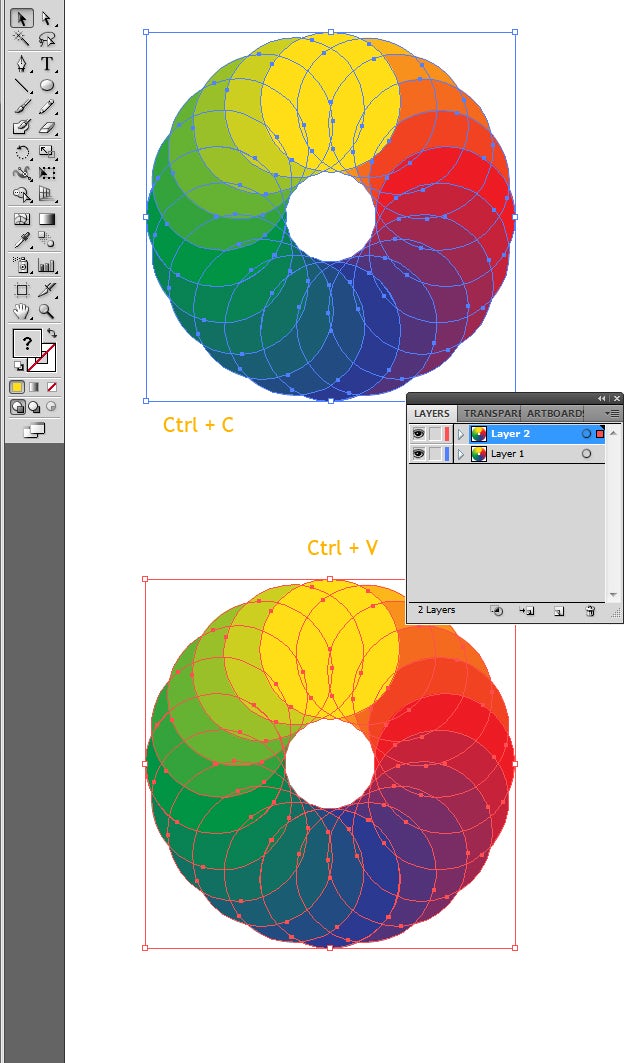
With all shapes selected, go to Object > Blend > Expand to split the Blend Object into separate shapes. Then right-click > Ungroup.

Copy the object (Ctrl+C) and paste (Ctrl+V) into a new layer.
On Layer 2:
- Select all parts
- Click Exclude on the Pathfinder palette
- Switch from Color Fill to Stroke (0.5 pt, black)
- And now we have a beautiful curve

Now, we want the yellow circle to be behind the orange circle. So let's go back to layer 1, and duplicate the top yellow circle into 5 circles.
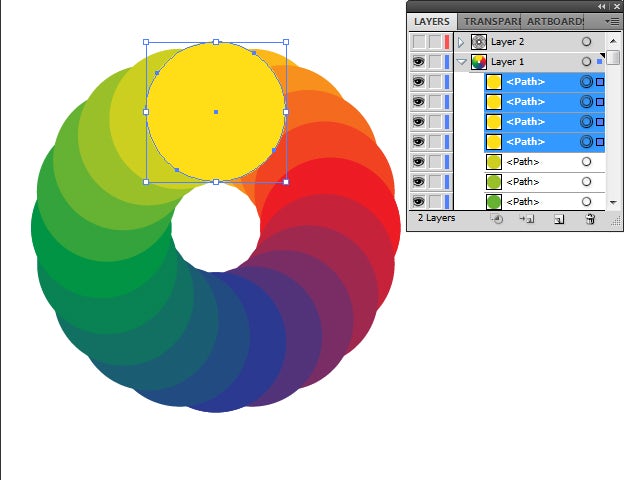
Select one of the yellow circles with a green circle underneath it (Shape 1). Then click Minus Front on the Pathfinder palette. Take another yellow circle and do the same thing until Shape 4.


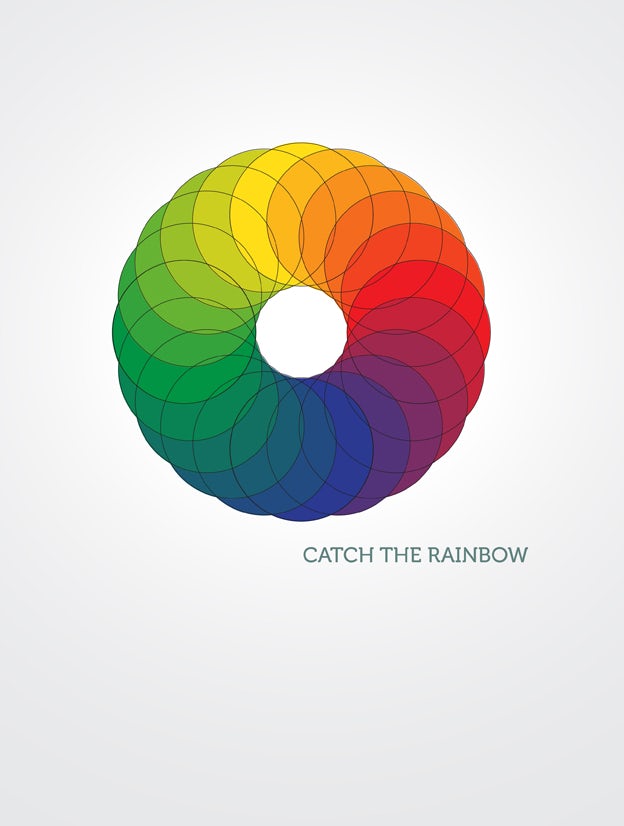
Now place Layer 2 above Layer 1 and center them.

Create a smooth gray gradient for the background.

Put a little text, and here's the final result!
Have any questions on how to make geometric shapes in Illustrator?
How To Blend Colors In Adobe Illustrator
Source: https://99designs.com/blog/tips/abstract-shape-using-illustrator-blend-modes/
Posted by: heiserfinguedy.blogspot.com
0 Response to "How To Blend Colors In Adobe Illustrator"
Post a Comment